
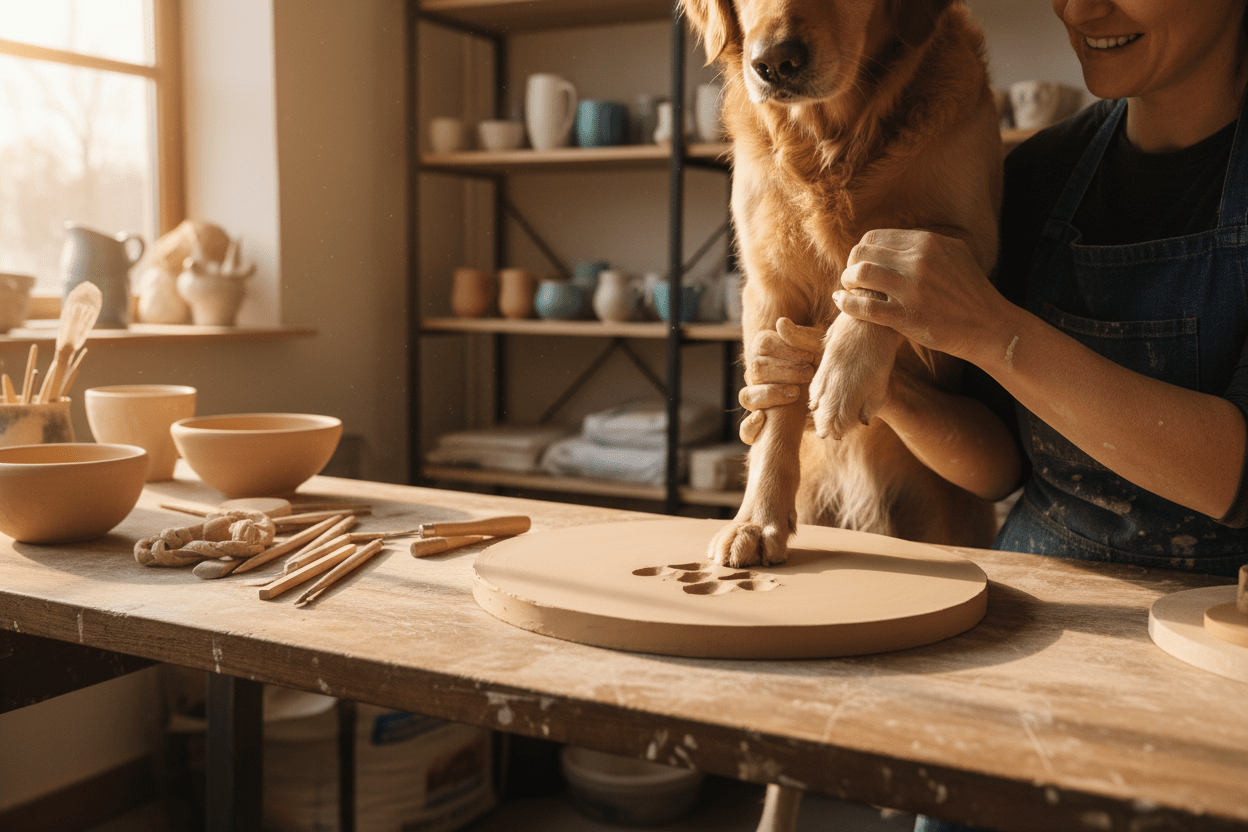
There's a particular kind of stillness in the moment just before your dog's paw touches the clay — you holding your breath, them trusting you completely, with no idea what's about to happen. Then it's done: a perfect, textured impression of every pad and claw, exactly as they are right now, at this age and this size.
That's the real appeal of a clay paw print keepsake. It isn't just a craft project — it's a small, deliberate pause with your pet, a moment of full attention that's easy to rush past in ordinary life. It's part of why we called this brand Ceramind: ceramics and mindfulness, the maker, the making, and the material becoming one thing.
Paw prints can be captured in ink, foam, or even scanned digitally from a vet-clinic printout, but clay is the only one of these that gives you something genuinely three-dimensional — every ridge of the pads, the gaps between the toes, even the texture of the fur if you press carefully. It's tactile in a way a flat print never quite manages.
The good news is that you don't need a pottery studio, a kiln, or any previous experience to make a beautiful, lasting keepsake. This guide covers everything: choosing the right clay for your situation, the technique for getting a clean print (even from a wriggly puppy or a thoroughly unimpressed cat), how to personalise and finish the piece, and what to do when the first attempt doesn't go to plan — because it often doesn't, and that's completely fine.
Choosing Your Clay: Air-Dry, Polymer, or Stoneware?
Before you press a single paw into clay, it's worth deciding which type to use, because it changes almost every step that follows — how thick to roll it, how long you'll wait to see the finished piece, and how it should be handled once it's done. There are three realistic options for a paw print project:
| Air-dry clay | Polymer clay | Stoneware (ceramic) clay | |
|---|---|---|---|
| Kiln needed? | No | No — a home oven | Yes |
| Cure time | 24–72+ hours air drying | 15–30 minutes per 6mm (¼in), oven-baked | Days to dry fully, then a bisque firing (and optional glaze firing) |
| Durability | Good, but can be brittle and reabsorb moisture if left unsealed | Very durable once baked; holds fine detail beautifully | Most durable of the three — a genuine ceramic heirloom |
| Best for | Beginners, a same-week keepsake, no equipment | Crisp detail without a kiln | Potters with kiln access, or anyone after the longest-lasting version |
Air-dry clay (DAS, Jovi, and Crayola Air-Dry are all widely available) is the easiest starting point — no oven, no kiln, just time. It's soft and forgiving to press into, though it's worth knowing that most air-dry clays are more fragile long-term than baked or fired alternatives, especially if the finished piece is never sealed. A coat of acrylic sealer or varnish once it's bone dry makes a genuine difference to how well it holds up over the years.
Polymer clay (Sculpey, Fimo, and similar brands) sits in a nice middle ground: no kiln required, just a home oven, and the result is genuinely durable and holds crisp detail extremely well — often better than air-dry clay manages. Most polymer clays cure somewhere around 110–135°C (230–275°F) for 15–30 minutes per 6mm (¼ inch) of thickness, though it's worth checking your specific brand's packaging, as Fimo, for instance, cures a little cooler and faster than Premo Sculpey. Never microwave polymer clay, and always bake it in a well-ventilated room.
Stoneware or earthenware clay — genuine pottery clay, fired in a kiln — is the option we'd recommend if you already have access to one, whether that's your own kiln, a local studio, an evening class, or hiring kiln space by the firing. It's the most durable and the most "heirloom" of the three: once bisque fired and optionally glazed, it will comfortably outlast the other two, standing up to knocks, damp, and fading in a way air-dry and polymer clay can't quite match. The tradeoff is a longer process — allow it to dry fully to "bone dry" before firing, since putting damp clay into a kiln risks cracking or even a small explosion as trapped moisture turns to steam — and the fact that stoneware shrinks as it dries and fires, typically by around 10–13% in total. That matters here: if you want the finished, fired paw print to end up a specific size, you'll need to press the paw into a piece of clay noticeably larger than that to begin with. Our Clay Shrinkage Calculator does that maths for you, and if you'd like the fuller explanation of why clay shrinks in the first place, we've written about it in Clay Shrinkage Explained.
If you're going the stoneware route, it's also worth batching your firing: putting a kiln through a full cycle for one small disc alone isn't the most economical use of it, so it's worth saving your paw print to fire alongside a full glaze or bisque load.
One clay worth a note of caution: homemade salt dough (flour, salt, and water) is a popular budget option you'll see recommended elsewhere, and it does work in a pinch — baked at a low oven temperature (around 100–120°C/200–250°F) for 2–3 hours, checking regularly. But keep it well away from pets both during and after making, since salt dough is toxic to dogs and cats if licked or eaten in any quantity, and it's best treated as a short-term craft project rather than a piece you're expecting to last for decades.
What You'll Need
- Your chosen clay — a piece roughly the size of a tennis ball is plenty for one medium-sized paw
- A rolling pin (or an improvised one — a clean glass jar or bottle works just as well)
- A smooth work surface: baking parchment, wax paper, or a piece of canvas or old cotton fabric all work well and help stop the clay sticking
- A cutting tool for shaping the edge: a butter knife, craft stick, or a cutter — our Clay Slab Cutters give a clean, consistent edge if you'd like a neat square or rectangle rather than a freeform circle
- A damp cloth to clean your pet's paw afterwards (and before, if they've been outside)
- Optional: a straw or skewer to poke a hanging hole before drying
- Optional decorative extras: letter stamps for a name or date — our Alphabet Stamp Set is designed for exactly this — or a set of Dog Paw Stamps or Cat Paw Stamps if you'd like to add a decorative paw motif border or accent around the real print
- A sealant appropriate to your clay: acrylic varnish for air-dry clay, glaze for stoneware, or nothing at all for polymer clay
Step-by-Step: How to Take a Paw Print in Clay
1. Prepare your clay. Knead it for a minute or two until it's soft, warm, and completely free of cracks or air pockets — this matters more than it sounds like it would, since any stiffness in the clay shows up as a less defined print. Shape it into a ball, then flatten it into a disc about 1.5–2cm thick (roughly ¾ inch). Thinner than this and you risk the paw pushing straight through; much thicker and you're adding drying time for no real benefit. If you're using stoneware and want a specific finished size, remember to size up for shrinkage first.
2. Shape the edge. Trim it into a circle, heart, or your own freeform shape with a knife or cutter, or simply smooth the natural edge with a damp finger.
3. Get your pet ready. This is usually the part people worry about most — so a little preparation goes a long way. Time it for right after a walk, a meal, or a nap, rather than mid-zoomies. Have treats ready, and ideally a second pair of hands. Wipe the paw clean of mud, litter, or dirt, and if your pet has particularly hairy or rough paw pads, a very light rub of coconut or olive oil can help lift a cleaner, more defined print. Stay calm and relaxed yourself — pets pick up on tension quickly.
4. Press the print. Set the clay disc on a firm, stable surface (the floor works better than a wobbly table). Hold your pet's leg gently just above the paw and press straight down into the centre of the clay — firmly enough to leave a full, clear impression of every pad, but not so hard that the paw pushes through to the bottom. Hold for two or three seconds, then lift straight up and away in one smooth motion. Avoid twisting, dragging, or wiggling as you lift; this is the single most common cause of a smudged or doubled-up print.
5. Check it, and don't be afraid to redo it. Is the print clear? Complete? Slightly off-centre but otherwise good? If it isn't quite what you'd hoped for, simply ball the clay back up, reflatten it, and try again. There's no limit on attempts, and even experienced potters rarely get a perfect print first time — which is exactly why it's worth having a little extra clay on hand.
6. Personalise it. While the clay is still soft, this is the moment to add anything else you'd like on the piece:
- Press your pet's name and the date underneath the print using individual letter stamps (our Alphabet Stamp Set makes lining these up simple) or freehand with a fine tool
- Add a decorative border or accent — a small repeating pattern around the edge using our Dog Paw Stamps or Cat Paw Stamps frames the real impression nicely, and is a lovely way to tie together a set of keepsakes if you're making one for each pet in a multi-pet household
- Smooth any rough edges with a damp finger or tool, and add a hanging hole now if you're making an ornament
7. Dry, bake, or fire it.
- Air-dry clay: leave it flat, out of direct sun or heat, turning it every so often so both sides dry evenly — this helps prevent warping and cracking. Expect 24–72 hours depending on thickness and humidity, sometimes longer for a thicker piece.
- Polymer clay: bake according to your brand's instructions (typically 110–135°C / 230–275°F for 15–30 minutes per 6mm/¼ inch), then let it cool completely before handling, since it firms up further as it cools.
- Stoneware: dry it slowly and evenly to "bone dry" over several days to a week before its first, bisque firing, then glaze and fire again for a coloured, glossy finish. If cone numbers are new to you, our guide to pottery firing temperatures and cones has the background.
8. Seal and finish. Air-dry clay isn't naturally waterproof, so a coat of acrylic sealer, varnish, or a few layers of Mod Podge once it's fully dry will protect it from humidity and handling for years. Polymer clay doesn't need sealing, though a light varnish adds a nice sheen if you'd like one. Glazed stoneware is already sealed by the glaze itself; unglazed, bisque-only pieces can still take a matte varnish if you'd prefer to keep the natural clay colour while adding some protection.
Special Situations to Plan For
A wriggly, nervous, or camera-shy pet. Not every pet is a natural. If yours is more likely to bolt than sit patiently, a few things help: practise the pressing motion on a lump of spare clay (or even playdough) first, so you're confident with the pressure and speed before it counts; try right after a walk, meal, or nap; and bring in a second person, one to hold treats and reassure, one to handle the clay. If your pet genuinely won't tolerate it, that's completely fine — a decorative Dog Paw Stamp or Cat Paw Stamp impression can still capture a lovely, breed-appropriate paw motif for the keepsake, even without a live print.
Multiple pets, tiny paws, or giant paws. Scale your clay disc to the paw rather than the other way around — a kitten or toy-breed puppy might only need a piece the size of a golf ball, while a large dog's paw may need a disc closer to the size of a small side plate. If you're making prints for more than one pet, giving each its own disc (rather than trying to fit two prints onto one) generally gives a cleaner result, and a matching decorative stamp border across all of them is a nice way to make a set feel intentional rather than mismatched.
If your pet has recently passed, or you weren't able to take a print in time. Paw print keepsakes are one of the most common ways people choose to remember a pet who's passed, and if that's why you're here, we're sorry for your loss. There's no wrong way to approach this and no need to rush it. Some vets and pet hospices offer to take a clay or ink impression during a final visit; others keep records worth asking about afterwards. If a live print genuinely isn't possible — whether because your pet has already passed, or because pressing their paw was never something they could tolerate — a decorative paw stamp can still create a beautiful, lasting piece in their memory, personalised with their name and dates. It won't be their exact paw, but it can still be entirely theirs in every other way.
Displaying Your Finished Keepsake
- As an ornament — thread ribbon, twine, or leather cord through a hanging hole for the Christmas tree, or year-round on a hook by the door
- On a small easel or stand on a shelf, mantelpiece, or bedside table
- In a shadow box, alongside a collar, a favourite toy, or a photograph, for a fuller memorial display
- As a gift — a second (or third) print made at the same sitting makes a genuinely thoughtful gift for grandparents or anyone else who loves your pet as much as you do
- Framed flat, as part of a gallery wall alongside pet photographs
Common Mistakes to Avoid
- Clay too thin — the paw pushes straight through. Aim for at least 1.5–2cm (¾ inch).
- Clay too dry or stiff before pressing — knead it properly first; stiff clay gives a shallow, unclear print.
- Pressing at an angle — always press straight down and lift straight up; an angled press smudges the detail.
- Twisting or dragging on the lift — the single biggest cause of a doubled or blurred print.
- Skipping the paw clean-up — mud, litter, or excess fur can obscure the pad detail; a quick wipe first makes a real difference.
- Rushing the drying — air-dry clay dried too quickly, in direct sun or near a radiator, is far more likely to crack. Slow and even is best.
- Firing damp stoneware — always let ceramic clay dry fully to bone dry before it goes anywhere near a kiln.
Frequently Asked Questions
What's the best clay for a pet paw print keepsake? It depends on what you value most. Air-dry clay is the easiest and cheapest starting point with no equipment needed. Polymer clay gives excellent detail and durability without a kiln. Stoneware, fired in a kiln, is the most durable and long-lasting option if you have access to one.
How do I stop my dog or cat moving during the paw print? Time it for right after a walk or a meal, use treats and a calm voice, and bring in a second pair of hands if you can. Practising the pressing motion on spare clay beforehand also helps you move quickly and confidently once your pet's paw is actually on the clay.
How thick should the clay be for a paw print? About 1.5–2cm (¾ inch) is a good rule of thumb for most dogs and cats — thick enough that the paw won't push through, thin enough that it doesn't take excessively long to dry or fire.
How long does a clay paw print take to dry? Air-dry clay typically takes 24–72 hours depending on thickness and humidity. Polymer clay bakes in 15–30 minutes per 6mm (¼ inch) of thickness. Stoneware needs several days to dry fully before its first firing.
Do I need to seal a clay paw print? Air-dry clay benefits from a coat of acrylic sealer or varnish once fully dry, since it isn't naturally waterproof. Polymer clay doesn't need sealing. Glazed stoneware is already sealed by the glaze itself.
Can I make a paw print keepsake if my pet has already passed away? Yes, if your vet or a pet hospice took a clay or ink impression, or if you have access to a paw print on file. If a live print isn't available, a decorative paw stamp can still create a beautiful, personalised keepsake in their memory.
Can I make more than one paw print at the same sitting? Yes — it's a good idea to make a spare print or two while your pet is cooperating, both as a backup if the first attempt doesn't come out well, and as a gift for other family members.
Final Thoughts
A paw print keepsake is a small thing, in the end — a disc of clay, no bigger than your palm. But making one asks you to slow down, just for a few minutes, and be completely present with your pet: their weight, their trust, the particular shape of feet that carry them through every walk and every doorway of your home. That's really the whole idea behind Ceramind — ceramics and mindfulness, the maker and the moment becoming one thing. Whatever clay you choose, and however the first attempt turns out, we hope the process is as rewarding as the little paw-shaped keepsake waiting for you at the end of it.
If you'd like to add a decorative touch — a paw-shaped border, your pet's name in neat lettering, or a symbolic print for a pet who can't safely take part themselves — take a look at our Dog Paw Stamps, Cat Paw Stamps, and Alphabet Stamp Set.
Share:
Underglaze vs. Glaze vs. Engobe vs. Slip: The Complete Guide to Ceramic Surface Decoration