
What is Bisque Firing? A Complete Guide to the First Firing
If you're new to pottery, you've likely heard potters mention bisque firing and wondered what it means. This essential first firing transforms fragile, breakable clay into durable ceramic material ready for glazing. Understanding bisque firing is fundamental to successful pottery practice, as this critical step affects everything from how your glazes apply to the final strength of your finished pieces. This comprehensive guide explores what bisque firing is, why it's necessary, how it works, and best practices for achieving optimal results.
Understanding Bisque Firing Basics
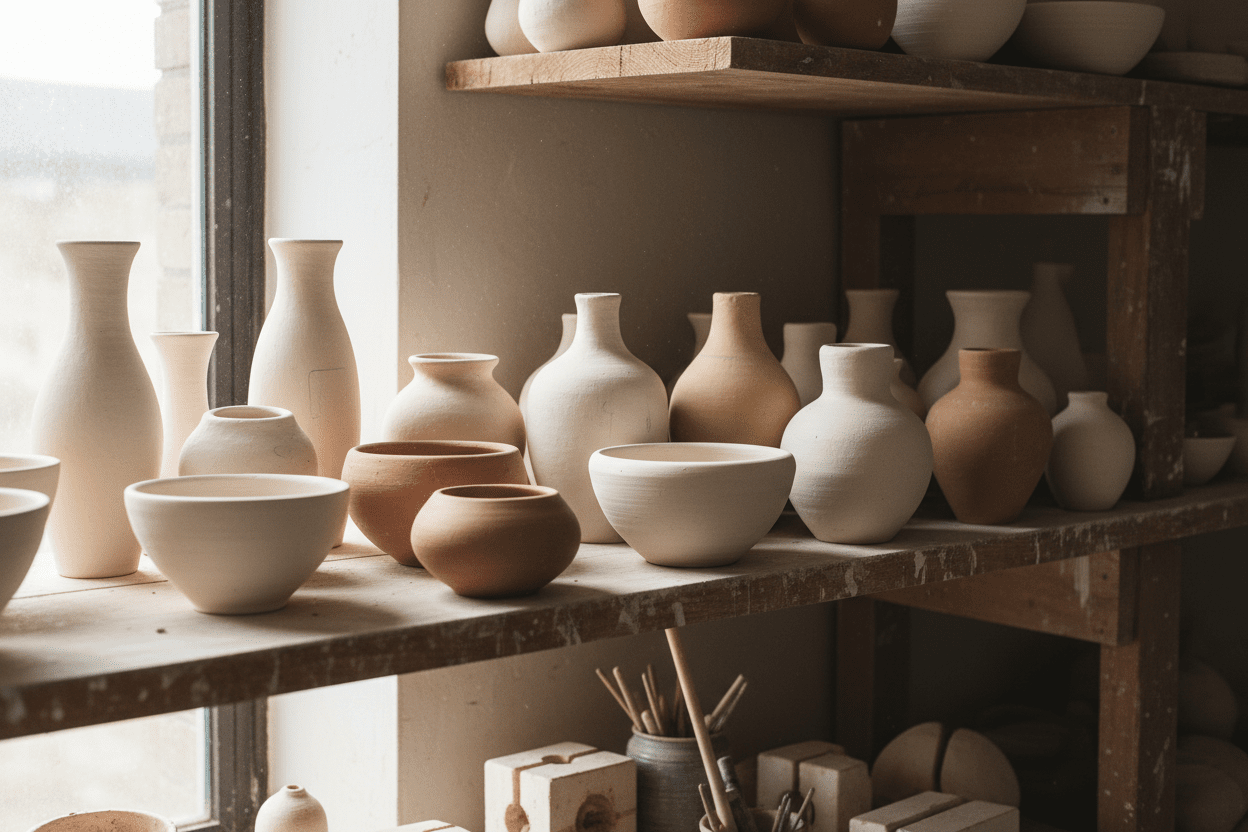
Bisque firing, also called biscuit firing, is the initial firing of clay that transforms raw, dried clay (called greenware) into a porous, permanent ceramic material. The term "bisque" comes from the French word for twice-baked, though in modern pottery practice, bisque refers specifically to the first of typically two firings—bisque followed by glaze firing.
During bisque firing, clay undergoes irreversible chemical and physical changes. Water molecules chemically bonded to clay particles are driven off, organic materials burn away, and clay particles begin to sinter (bond together) without fully vitrifying (becoming glass-like). The result is a porous, hard material that can no longer be dissolved in water or returned to a plastic state.
Bisque-fired pottery is strong enough to handle without breaking, yet porous enough to absorb water. This porosity is crucial because it allows glazes to adhere properly to the clay surface. Without bisque firing, applying glaze to raw clay would be extremely difficult—the clay would either dissolve from the water in the glaze or remain too fragile to handle during the glazing process.
Why Bisque Firing is Necessary
While some pottery techniques skip the bisque firing stage (single firing or "once firing" applies glaze directly to raw clay), most potters use bisque firing because it offers significant advantages.
Making Clay Handleable
After bisque firing, pottery becomes durable enough to handle, dip in glaze, and transport without the extreme fragility of greenware. Raw clay, even when bone dry, remains brittle and can break from minor impacts or moisture exposure. Bisque-fired pieces can withstand the handling required for glazing, including dipping, pouring, and brushing techniques that would destroy greenware.
Creating Porosity for Glazing
The porous nature of bisqueware allows it to absorb water from liquid glazes. When you dip a bisque piece into glaze, the water quickly absorbs into the clay body, leaving a layer of glaze particles on the surface. This absorption creates even glaze application and proper glaze thickness. Without bisque porosity, achieving consistent glaze application would be nearly impossible.
Burning Out Impurities
Bisque firing burns away organic materials, carbonaceous matter, and sulfur compounds present in clay. If these materials remained until glaze firing, they would decompose and release gases that create pinholes, bloating, or blistering in your finished work. The lower temperature and slower initial heating of bisque firing allows these materials to escape safely before the glaze seals the surface.
Revealing Problems Early
Bisque firing reveals structural problems, cracks, or weaknesses before you invest time in glazing. A piece that cracks or breaks during bisque firing would have failed during glaze firing anyway—discovering problems after bisque saves the effort of glazing doomed pieces. This early quality control helps you identify and correct technique problems before they affect glazed work.
Simplifying the Glaze Firing
By completing chemical changes during bisque firing, the glaze firing can focus on melting and maturing the glaze without dealing with clay body transformations. This separation of processes creates more predictable, successful results and allows for faster glaze firing schedules.
The Science Behind Bisque Firing
Understanding what happens inside the kiln during bisque firing helps you appreciate why proper firing schedules matter and how to troubleshoot problems.
Water Removal Stages
Clay contains water in multiple forms, and bisque firing drives it all out. Atmospheric water (water between clay particles) evaporates during drying before firing. Chemical water (water molecules bonded to clay particles) remains until temperatures reach approximately 660-900°F (350-480°C). This chemically bonded water releases gradually as temperatures rise, and rushing through this stage can cause pieces to crack or explode from steam pressure.
Between room temperature and 200°F (95°C), any remaining atmospheric moisture converts to steam. Even thoroughly dried greenware can retain some moisture, especially in thick sections. Many firing schedules include a "water smoking" or "candling" stage that holds temperatures around 200°F (95°C) for several hours, ensuring complete moisture removal before temperatures rise further.
Organic Material Burnout
Between approximately 400-800°F (200-425°C), organic materials in the clay begin decomposing and burning away. This includes plant matter, carbon particles, and sulfur compounds. You might notice smoke coming from kiln vents during this stage, and the studio may smell slightly acrid—this is normal. Adequate ventilation becomes important during bisque firing to exhaust these combustion gases safely.
Clay Particle Sintering
As temperatures exceed 900°F (480°C), clay particles begin sintering—fusing together at their contact points without melting. This sintering process creates the permanent ceramic material we call bisqueware. The particles bond through solid-state diffusion, a process where atoms migrate between particles at the molecular level, creating strong connections.
Quartz Inversion
Around 1063°F (573°C), crystalline silica in the clay undergoes a structural transformation called quartz inversion. The crystal structure changes, causing brief expansion. Both heating and cooling through this temperature must proceed slowly to prevent thermal shock that can crack pieces. Most bisque firing schedules naturally account for this by programming slower heating rates through the critical range.
Typical Bisque Firing Temperatures
Bisque firing typically occurs between cone 08 and cone 04, roughly 1751-1945°F (955-1063°C). The specific temperature depends on your clay body and glazing requirements.
Cone 08 to 06 (1751-1828°F / 955-996°C)
Lower bisque temperatures create more porous bisqueware that absorbs glaze readily. This works well for earthenware clays and heavily textured work where high porosity helps glaze penetrate into surface details. However, very low bisque firing produces relatively weak bisqueware that's more fragile during handling and glazing.
Cone 04 (1945°F / 1063°C)
Cone 04 is the most common bisque firing temperature for many studios. It creates strong bisqueware that's still porous enough for good glaze absorption. This temperature works well for most clay bodies—earthenware, stoneware, and porcelain—and provides a good balance between strength and porosity.
Matching Bisque to Glaze Firing
Some potters bisque fire higher than their glaze firing temperature, while others do the opposite. Low-fire earthenware (cone 06) might be bisque fired to cone 04, then glaze fired to cone 06. High-fire stoneware might be bisque fired to cone 04, then glaze fired to cone 10. The key is ensuring adequate bisque porosity for glaze absorption while creating sufficient strength for handling.
Bisque Firing Schedules and Techniques
Proper firing schedules are crucial for successful bisque firing. While exact schedules vary based on kiln type, clay body, and piece size, certain principles apply universally.
Slow Initial Heating
The early stages of bisque firing require slow heating to allow moisture and gases to escape safely. A typical schedule holds around 200°F (95°C) for 2-3 hours for water smoking, then increases by 100-200°F (40-95°C) per hour through the organic burnout stage up to about 1000°F (540°C).
Rushing the initial heating risks cracking or explosions from trapped steam. Thicker pieces, sculptures, or pieces with significant thickness variations need even slower initial heating. Some potters candle their kilns—leaving them on very low heat overnight—to ensure complete drying before ramping up temperature.
Controlling Temperature Rise
After the critical early stages, heating can proceed faster but should still move through quartz inversion (around 1063°F/573°C) at a controlled rate. Most programmable kilns include segments that slow the heating rate through this range to prevent thermal shock.
A typical mid-stage heating rate might be 200-300°F (95-150°C) per hour from 1000°F to 1600°F (540-870°C), then 100-150°F (40-65°C) per hour through the final climb to peak temperature.
Peak Temperature and Soaking
Once the kiln reaches target temperature (indicated by witness cones bending or digital controllers completing their program), many potters include a hold or soak period. Holding peak temperature for 15-30 minutes ensures even heat distribution throughout the kiln and allows pieces in cooler spots to catch up to those in hot spots.
Cooling Considerations
Cooling bisque firing is less critical than cooling glaze firing, but some care still helps. Cooling through quartz inversion should proceed at moderate rates to prevent thermal shock. Most potters let bisque kilns cool naturally without opening vents or lids, though you can crack vents slightly once temperatures drop below 1000°F (540°C) to speed cooling.
Never open the kiln until it cools below 200°F (95°C). Opening too early introduces thermal shock that can crack pieces and also exposes you to dangerous heat and fumes.
Loading the Kiln for Bisque Firing
Bisque firing offers more freedom in kiln loading than glaze firing because pieces can touch each other without sticking together.
Efficient Space Utilization
Since bisque pieces don't have glaze that might fuse them together, you can stack bowls inside bowls, nestle smaller pieces inside larger ones, and generally pack the kiln more densely than for glaze firing. This efficiency reduces firing costs and increases productivity.
However, avoid creating completely enclosed spaces where gases can't escape. Leave small gaps between stacked pieces to allow air circulation. Don't pack the kiln so tightly that heat can't circulate—some space between pieces ensures even firing.
Supporting Work Properly
While pieces can touch during bisque firing, they still need proper support to prevent warping. Large plates or platters should be placed flat on shelves, not stacked unless fully supported. Tall pieces need stable bases and shouldn't lean against other work. Lids should be fired on their pots or separately on shelves, never balanced precariously.
Kiln Furniture Considerations
Bisque firing is hard on kiln furniture. Organic materials burning out can discolor kiln shelves, and pieces occasionally crack or break, sometimes adhering to shelves. Using old, stained shelves for bisque and reserving your best shelves for glaze firing makes economic sense.
You don't need kiln wash on shelves for bisque firing since pieces won't stick without glaze. However, many potters apply kiln wash anyway to protect shelves and create a consistent routine.
Testing Bisque Results
After firing, examine your bisqueware to ensure successful results.
Visual Inspection
Properly bisque-fired pieces should have uniform color throughout, with no dark spots indicating underfiring or dampness. The surface should be slightly rough and chalky to the touch, indicating porosity. Shine a light through thin sections of porcelain or white clay—properly bisqued pieces should show some translucency.
The Water Test
Drop a small amount of water on bisqueware—it should absorb quickly, disappearing within seconds. If water beads up or absorbs slowly, the bisque may be overfired and too vitrified, which can cause glaze adhesion problems.
The Sound Test
Tap bisqueware gently with your finger. It should produce a dull, muted sound rather than the clear ring of fully fired stoneware. The dull sound indicates porosity and proper bisque firing.
Common Bisque Firing Problems and Solutions
Even with careful preparation, problems can occur during bisque firing.
Cracking During Firing
Cracks appearing during bisque firing usually indicate inadequate drying before loading the kiln. Even pieces that feel completely dry can retain moisture internally, especially in thick sections. Solution: Allow extra drying time, use a slower initial firing schedule, or place questionable pieces on top of the warm kiln during a firing to ensure complete dryness.
Uneven Firing Results
Some pieces properly fired while others are underfired indicates temperature variation within the kiln. Solution: Use witness cones in multiple locations to map your kiln's hot and cold spots, rotate shelf positions between firings, and ensure proper spacing for heat circulation.
Black Coring
Dark gray or black centers visible in broken bisqueware indicate incomplete burnout of organic materials and carbon. Solution: Fire to a slightly higher temperature, extend the hold time at peak temperature, or slow the heating rate through the organic burnout phase (400-800°F / 200-425°C).
Exploded Pieces
Pieces that explode during bisque firing contained either trapped air pockets or residual moisture. Solution: Wedge clay more thoroughly to remove air, ensure pieces are completely dry before firing, and use slower initial heating rates, especially the candling phase.
Single Firing vs. Bisque Firing
Some potters practice single firing (or "once firing"), applying glaze directly to raw clay and firing only once. This technique, while challenging, reduces firing costs and energy use.
Single firing requires exceptional skill in glaze application since you're working with fragile greenware. The glaze must be carefully formulated to work with the shrinkage and water content of raw clay. Most beginners find bisque firing more forgiving and practical, saving single firing exploration for after they've mastered fundamental techniques.
The Role of Bisque Firing in Your Pottery Practice
Bisque firing represents a milestone in every pottery piece's journey from soft clay to finished ceramic. Understanding this crucial transformation helps you appreciate why proper drying, careful kiln loading, and appropriate firing schedules matter. The seemingly simple act of heating clay to around 1800-1950°F (980-1065°C) triggers complex chemical and physical changes that make all subsequent steps possible.
As you gain experience, you'll develop intuition about when pieces are ready for bisque firing, how your specific kiln fires, and what bisque results work best for your glazing techniques. This knowledge, built through practice and observation, becomes part of your craft mastery.
Whether you're a beginner loading your first bisque kiln or an experienced potter refining your process, understanding bisque firing's purpose, science, and best practices helps you create better pottery and troubleshoot problems effectively. This fundamental step, though invisible in your finished work, provides the foundation for everything beautiful that comes after.

Share:
How to Use a Pottery Wheel for Beginners: Your Complete Step-by-Step Guide
Pottery Firing Temperatures Explained: A Complete Guide to Cones, Heat, and Clay Maturation