
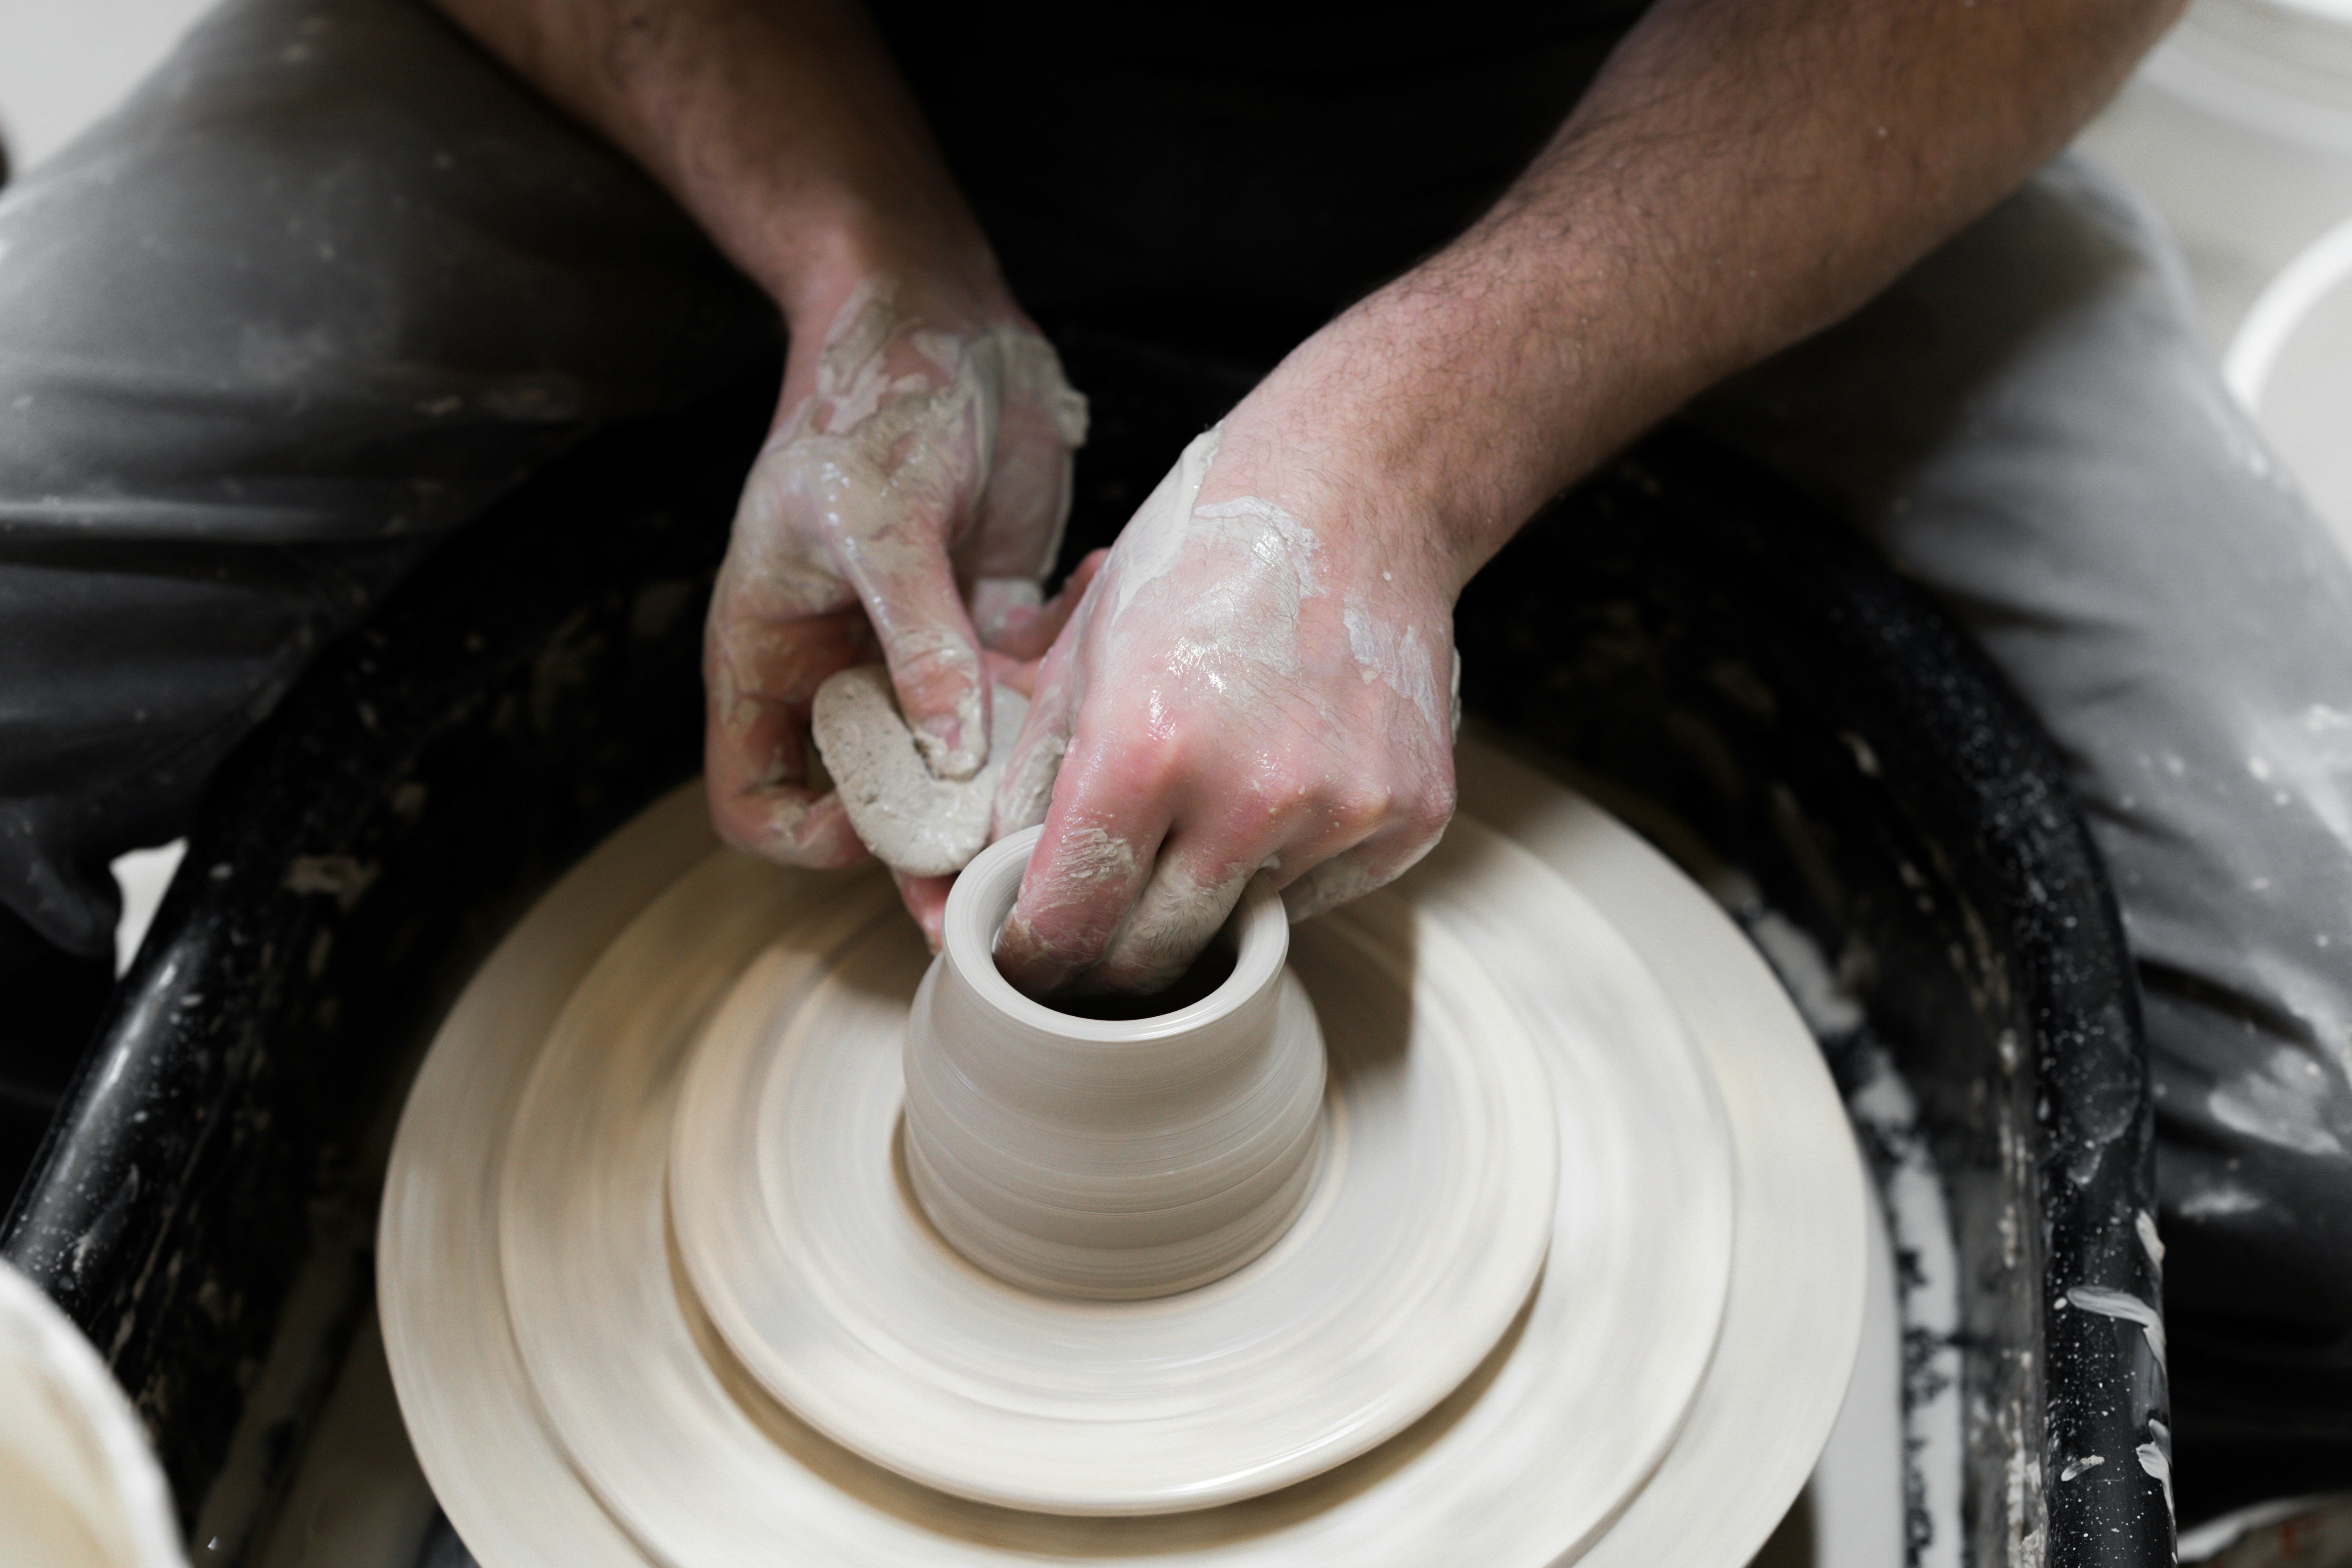
Learning to use a pottery wheel is one of the most rewarding yet challenging experiences in ceramics. The image of a potter effortlessly shaping spinning clay looks magical, but the reality involves patience, practice, and understanding fundamental techniques. This comprehensive guide will walk you through everything you need to know to start your wheel throwing journey, from setting up your workspace to creating your first successful piece.
Understanding Your Pottery Wheel
Before diving into techniques, familiarize yourself with your wheel's components and how it functions.
Basic Wheel Components
The wheel head is the flat, round disc that spins and holds your clay. Most wheel heads are made of metal or plastic and typically measure 12-14 inches in diameter. Some wheels use bats—removable boards that attach to the wheel head, allowing you to remove thrown pieces without disturbing them.
The splash pan surrounds the wheel head, catching water, slip, and clay scraps during throwing. Keep this area clean to maintain a comfortable working environment and prevent clay buildup that could interfere with wheel mechanics.
The foot pedal or hand lever controls wheel speed. Electric wheels use foot pedals similar to sewing machines, while some wheels have hand levers or electronic controls. Practice controlling speed smoothly before working with clay—jerky speed changes make throwing difficult.
The seat should position you at proper height. When seated, your hands should comfortably reach the center of the wheel head without hunching or stretching. Adjust seat height so your arms can move freely and your back remains straight.
Electric vs. Kick Wheels
Most beginners learn on electric wheels, which offer consistent speed and easy control. Kick wheels, powered by your leg momentum on a large flywheel, require more coordination but provide intimate connection with the throwing process. For learning basic techniques, electric wheels are more forgiving and allow you to focus on hand position rather than maintaining momentum.
Setting Up Your Workspace
Proper workspace setup prevents fatigue and supports good technique development.
Essential Tools and Materials
Before starting, gather these basic supplies:
- Clay: Start with 10-15 pounds of smooth, plastic stoneware or earthenware. Avoid heavily grogged clay for learning, as it's rough on hands.
- Water bucket and sponge: Keep water nearby for lubricating clay during throwing.
- Cutting wire: For removing finished pieces from the wheel head.
- Wooden or metal rib: For smoothing and shaping.
- Needle tool: For trimming rims and checking wall thickness.
- Towel: For wiping hands frequently—clean, dry hands are essential for control.
- Bucket for scraps: Collect trimmings and collapsed pieces for reclaiming.
Position your water bucket within easy reach on your dominant side. Place tools where you can grab them without looking away from your work. Keep the towel draped over your lap or nearby for frequent hand wiping.
Body Position and Ergonomics
Proper body position prevents fatigue and injury while supporting better control. Sit centered in front of the wheel with both feet flat on the floor (non-throwing foot) or on the pedal (throwing foot for right-handed potters). Keep your back straight, shoulders relaxed, and elbows braced against your body or thighs for stability.
Your arms should move from your core, not just your hands. Bracing your elbows provides the stability needed for controlled throwing. Leaning over the wheel for long periods causes back pain—adjust seat height to maintain upright posture.
Preparing Your Clay
Clay preparation is crucial for successful throwing. Poorly prepared clay leads to wobbling, tearing, and frustration.
Wedging: The Foundation of Good Throwing
Wedging aligns clay particles, removes air pockets, and creates uniform consistency throughout your clay. Take a ball of clay about the size of a grapefruit (roughly 2-3 pounds for your first attempts) and wedge it thoroughly for at least 50-100 repetitions using either spiral or ram's head wedging technique.
After wedging, form the clay into a smooth ball by rolling it between your palms, then slapping it firmly between your hands to create a rounded cone shape. This cone shape makes centering easier than starting with a ball. Set the prepared clay aside and prepare several pieces so you can practice multiple times without stopping to wedge.
The Right Amount of Clay
Beginners should start with 2-3 pounds of clay—enough to provide substance for learning but not so much that it becomes unmanageable. As you gain confidence, gradually increase to 5-6 pounds. Many experienced potters can throw with 10-15 pounds or more, but starting small allows you to focus on technique rather than wrestling with heavy clay.
Centering: The Most Critical Skill
Centering is the foundation of all wheel throwing. Until you can center clay consistently, you cannot progress to other techniques. This skill takes most beginners several practice sessions to develop, so be patient with yourself.
Attaching Clay to the Wheel Head
Start with the wheel stopped. Take your cone-shaped clay and slam it firmly onto the center of the wheel head. The impact helps it stick. Press down hard with your palm to ensure good adhesion—clay that's not firmly attached will fly off when you start the wheel.
Add a small amount of water to the clay surface and your hands. You want just enough water to create slip for lubrication, not so much that the clay becomes soupy. Throughout throwing, add water sparingly—too much water weakens clay structure.
The Centering Process
Start the wheel at moderate speed—about half your wheel's maximum. Beginning potters often try to center at very high speeds, but moderate speeds provide better control.
Position your hands: Place your left hand (for right-handed potters) against the far side of the clay, fingers pointing toward the wheel head. Your right hand cups over the top, pressing downward. Brace both elbows firmly against your body or inner thighs—this bracing is crucial for stability.
Apply pressure: Using your whole body (not just arm strength), apply steady, even pressure inward with your left hand while pressing down with your right. The clay should move toward center and compress downward into a low dome. Keep your hands completely still relative to each other—any wobbling of your hands transfers directly to the clay.
The moment of centering: As the clay centers, you'll feel it stop fighting against your hands. The wobbling sensation disappears, replaced by smooth resistance. The clay appears perfectly round and symmetrical. This moment is unmistakable once you experience it.
Common centering mistakes:
- Pushing too hard from only one side, creating worse wobble
- Not bracing your arms, allowing your hands to move independently
- Adding too much water, making clay slippery and unworkable
- Giving up too quickly—centering often requires sustained pressure for 30-60 seconds
- Gripping the clay instead of applying steady pressure
Practice centering repeatedly. Center the clay, then deliberately off-center it and practice centering again. This repetition builds muscle memory faster than trying to proceed immediately to the next step.
Opening: Creating the Interior Space
Once your clay is perfectly centered, you'll open it to create the vessel's interior.
The Opening Technique
Slow the wheel slightly—opening works best at moderate to slow speeds. Keep your clay wet enough for smooth movement but not swimming in water.
Create the opening: Place your fingers (usually the index and middle fingers of your dominant hand) directly in the center of the spinning clay. Press straight down slowly and steadily, keeping your other hand braced on the outside of the clay for support. Push down until you're about half an inch from the wheel head—use a needle tool to measure depth if unsure.
Widen the floor: With fingers still in the clay's center, gently pull outward toward yourself while maintaining downward pressure. This creates the vessel's floor. Move slowly—rushing causes clay to tear or become uneven. The floor should be flat and even, typically 4-6 inches in diameter for a small bowl or cylinder.
Supporting the exterior: Throughout opening, your non-dominant hand should press gently against the outside of the clay wall, supporting it and preventing it from spreading too wide. This coordination between inside and outside hands is fundamental to all throwing.
Pulling Up Walls: Creating Height
Pulling up transforms your centered, opened clay into a vessel with walls. This technique requires coordination, patience, and practice.
Hand Position for Pulling
Position your hands so fingers are inside the vessel and thumb outside (or vice versa, depending on your preference). Many potters use their dominant hand inside with fingers hooked, while the non-dominant hand provides outside pressure with fingers and thumb.
The pull: Starting at the base of the wall, apply gentle pressure between your inside and outside hands, compressing the clay between them. This compression thins the wall. Slowly move your hands upward together, maintaining consistent pressure. The clay squeezes between your hands and rises.
Speed matters—pull too fast and clay tears; too slow and clay gets overworked. Each pull should take 5-10 seconds from bottom to top. Keep the wheel at moderate speed.
Multiple pulls: You'll need 3-5 pulls to create a vessel with proper height. After each pull, allow the clay to rest briefly. Use a sponge to remove excess water from inside the vessel—water pooling in the bottom weakens the clay.
Wall thickness: Beginners often make walls too thick. Aim for quarter-inch thickness for learning—thick enough to be forgiving but thin enough to demonstrate proper technique. Check thickness periodically by pinching the wall gently or using a needle tool to pierce through and measure.
Common Pulling Mistakes
- Uneven pressure: Pulling harder on one side creates wobbles. Keep pressure balanced between inside and outside hands.
- Losing support: If your outside hand drops away, the wall flares outward uncontrollably. Maintain continuous contact with both hands.
- Too much water: Excessive water makes clay mushy and prone to collapse. Add water only when clay becomes slightly sticky.
- Pulling from the rim: Always start pulls at the base, not partway up the wall. Starting high creates thin tops and thick bottoms.
Shaping and Finishing
Once your walls are pulled up, you can shape the vessel into bowls, cylinders, or other forms.
Creating Different Forms
Cylinders: Keep walls straight by maintaining equal inside and outside pressure as you pull. This is the most challenging basic form because it requires perfect balance.
Bowls: Apply more pressure from inside than outside while pulling, encouraging walls to move outward. Support the outside to control the curve.
Closed forms: Pull walls upward first, then gently collar in (squeeze from the outside) at the rim to narrow the opening. This technique creates bottle shapes and vases.
Finishing the Rim
A clean, even rim completes your piece. Use a wet sponge or chamois to compress and smooth the rim while the wheel spins slowly. You can also use a trimming tool to level an uneven rim—press the tool gently against the inside rim face while supporting the outside.
Removing Your Piece
Before removing, use a needle tool or wooden knife to undercut the piece—cutting away excess clay from the base where it meets the wheel head. Run your cutting wire flat against the wheel head, passing under the piece completely. Cup your hands around the pot and lift it straight up, setting it on a bat or board to dry.
If using bats, simply remove the entire bat with the piece attached, allowing it to dry without handling.
Your First Throwing Sessions: What to Expect
Understanding realistic expectations helps you stay motivated through the learning process.
Session One: Centering Practice
Your first session should focus exclusively on centering. Don't expect to create finished pieces. If you can center 2-3 pounds of clay consistently by the end of your first two-hour session, you're doing well. Many beginners need 3-5 sessions before centering becomes reliable.
Sessions Two Through Five: Opening and Basic Forms
Once centering becomes consistent, practice opening and pulling up walls. Expect many collapsed cylinders—this is completely normal. Every potter has created countless collapsed pots while learning. Each collapse teaches you about pressure, speed, and clay behavior.
Aim to create simple cylinders or small bowls. Don't worry about perfect symmetry or professional appearance. Focus on understanding the feeling of clay responding to your hands.
Building Muscle Memory
Wheel throwing is a physical skill requiring muscle memory, similar to playing an instrument or dancing. Your hands must learn to maintain position automatically while your mind focuses on the clay's response. This takes time—typically 20-30 hours of practice before movements begin feeling natural.
Troubleshooting Common Beginner Problems
Clay Won't Center
- Check that clay is firmly attached to the wheel head
- Brace your elbows more securely
- Reduce wheel speed if it's too fast
- Apply more confident, sustained pressure
- Ensure clay isn't too dry or too wet
Walls Keep Collapsing
- Reduce the amount of water you're using
- Pull more slowly and gently
- Keep walls thicker initially
- Brace your arms more firmly
- Lower wheel speed
Uneven Walls and Wobbling
- Recheck that clay is truly centered before opening
- Keep both hands moving together during pulls
- Maintain equal pressure on all sides
- Don't grip the clay—use gentle, steady pressure
Clay Sticks to Your Hands
- Wipe hands frequently on your towel
- Use less water on the clay surface
- Ensure hands are clean—dried clay bits on your hands cause sticking
Beyond the Basics: What's Next?
Once you can reliably create basic cylinders and bowls, you're ready to explore trimming (refining the foot and exterior), pulling handles, creating lids, and decorating techniques. But mastering centering, opening, and pulling walls provides the foundation for all advanced throwing techniques.
Consider taking a class if possible—in-person instruction allows teachers to correct hand position and technique issues difficult to diagnose on your own. Many community studios offer beginner wheel throwing classes that provide structured learning and practice time.
Practice Tips for Success
Consistency matters more than duration: Daily 30-minute practice sessions build skills faster than occasional marathon sessions. Muscle memory develops through repetition over time.
Start each session with centering practice: Before attempting to create pieces, center and re-center clay several times to warm up and refresh your muscle memory.
Reclaim your clay: Don't waste clay. Collapse failed pieces back into balls, let them dry slightly, then re-wedge and try again. Every piece of clay has multiple learning opportunities within it.
Be patient with yourself: Every accomplished potter struggled through the same challenges you're facing. The learning curve is steep, but improvement comes with consistent practice.
Celebrate small victories: Successfully centering for the first time, creating your first stable cylinder, or pulling walls thinner than before—these milestones matter. Acknowledge your progress even as you work toward bigger goals.
Conclusion: The Journey of Ten Thousand Pots
There's a saying in pottery that you must make ten thousand pots before truly understanding the craft. While that might sound daunting, it emphasizes that pottery is a journey requiring patience and persistence. Your first cylinders will be wobbly and thick-walled. Your early bowls may collapse or crack. This is not failure—it's the necessary path every potter walks.
With each session at the wheel, your hands learn a little more. Centering becomes easier. Pulling walls grows more intuitive. The moment when struggling gives way to flow—when clay responds smoothly to your touch and forms rise gracefully under your hands—makes all the practice worthwhile. Welcome to the potter's wheel, and enjoy every moment of this challenging, rewarding journey.

Share:
Clay Shrinkage Explained: Understanding Why Your Pottery Gets Smaller
What is Bisque Firing? A Complete Guide to the First Firing